“WP Guppy Pro” Documentation by “Amentotech”
“WP Guppy Pro”
Created: 06 November 2021
By: Amentotech
Email: help.amentotech@gmail.com
Thank you for purchasing our plugin. If you have any questions that are beyond the scope of this help file, please feel free to email via my user page contact form here. Thanks so much!
Table of Contents
Download - top
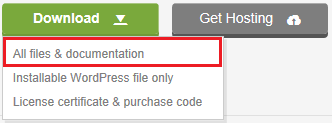
Upon downloading the zip package file from codecanyon, you'll have all files you need inside. Zip package contains the following files and
- wp-guppy.zip contains the plugin
- documentation folder (It contains documentation for the plugin)
To install this plugin you must have a working version of WordPress already installed. For more information regarding installing the WordPress, please visit below mentioned URL
Installing WordpressWhen you are ready to install a plugin, you must first upload the plugin files and then activate the plugin. For this purpose, unzip the file that you downloaded from codecanyon and there you would find the (wp-guppy.zip) file and upload it via WordPress installer. The plugin files can be uploaded in two ways
Installation - top
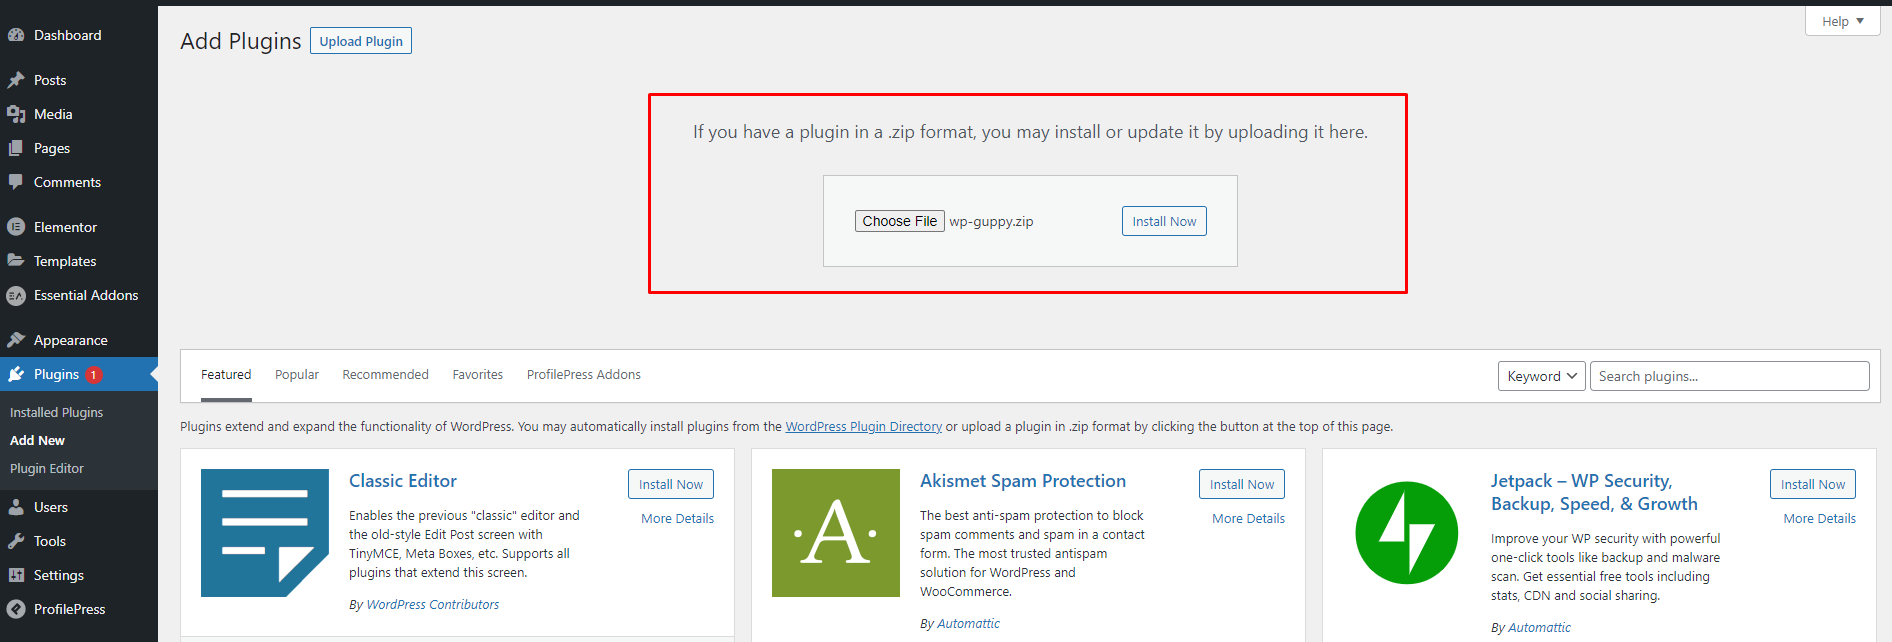
WordPress Upload
- Navigate to Appearance > Plugins
- Click Add New button and finally hit the Upload plugin
- Click on Choose File and find the "wp-guppy.zip" file on your computer and click Install Now button
- The plugin will be uploaded and installed.
- For activating the plugin, Go to Appearance > Plugins and activate the installed plugin
Settings - top
General settings
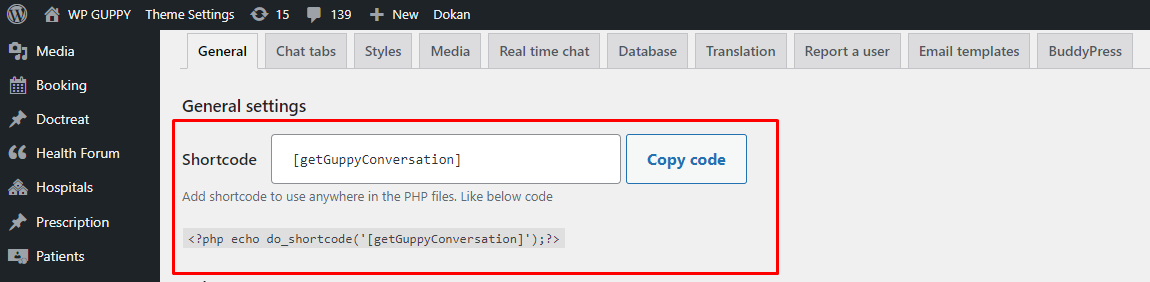
To access the general setting, go to WP guppy > General. Here you will see many useful settings for your messenger chat and chat role assigning etc.
Add messenger to any page?
In general settings, you will see the shortcode copy and put it anywhere in the WordPress site to show the messenger page.
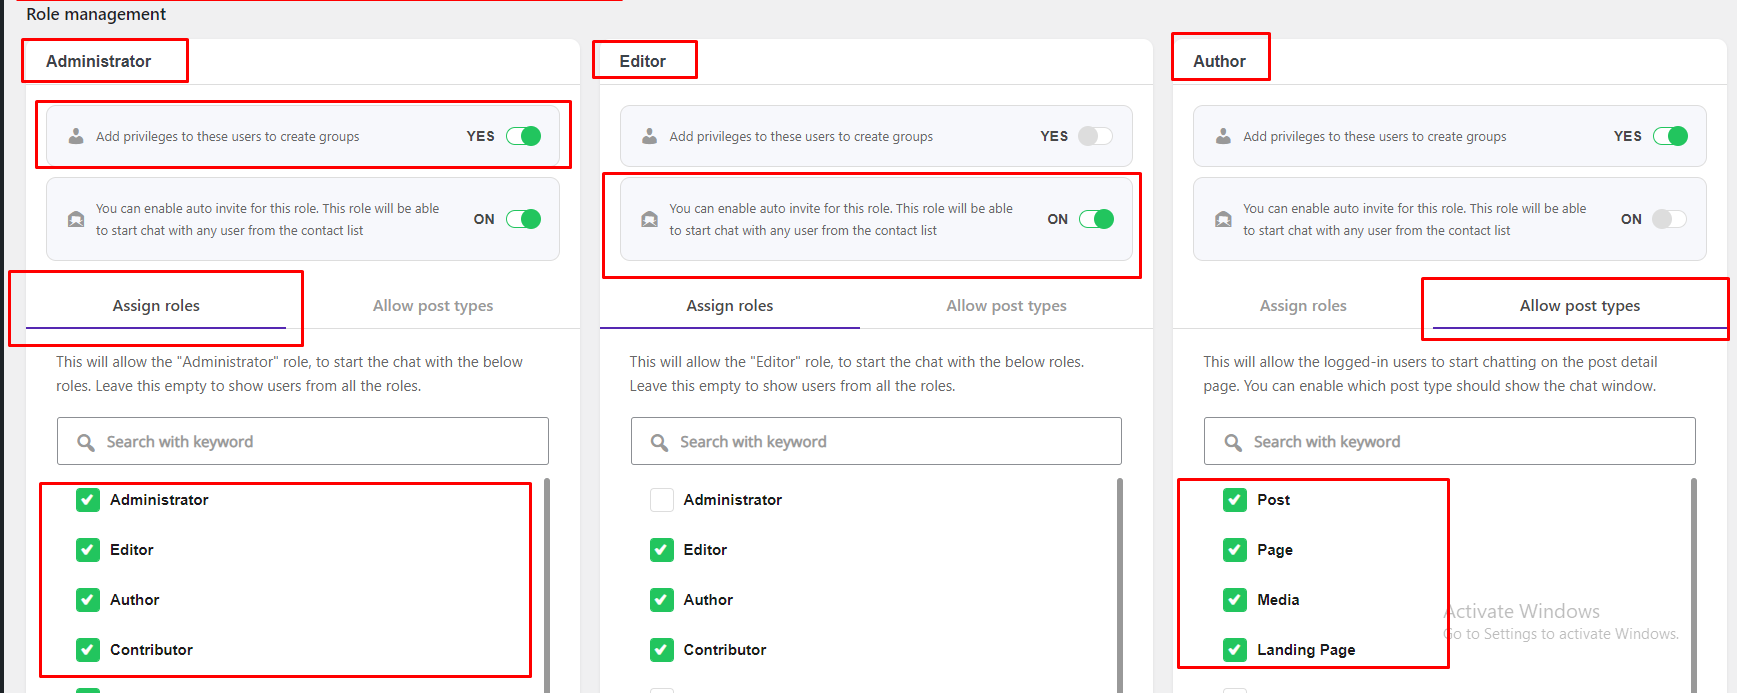
Manage user chat roles
In general settings, you will see role management, where the admin can manage user chat roles with a few clicks.
- Admin can select which users can see which based on their roles in their contact list.
- Admin can select which user role can start the chat with an auto-invite.
- Admin can select which user role can create a group.
- Admin can select which user role can chat on the post type pages.
WooCommerce compatibility
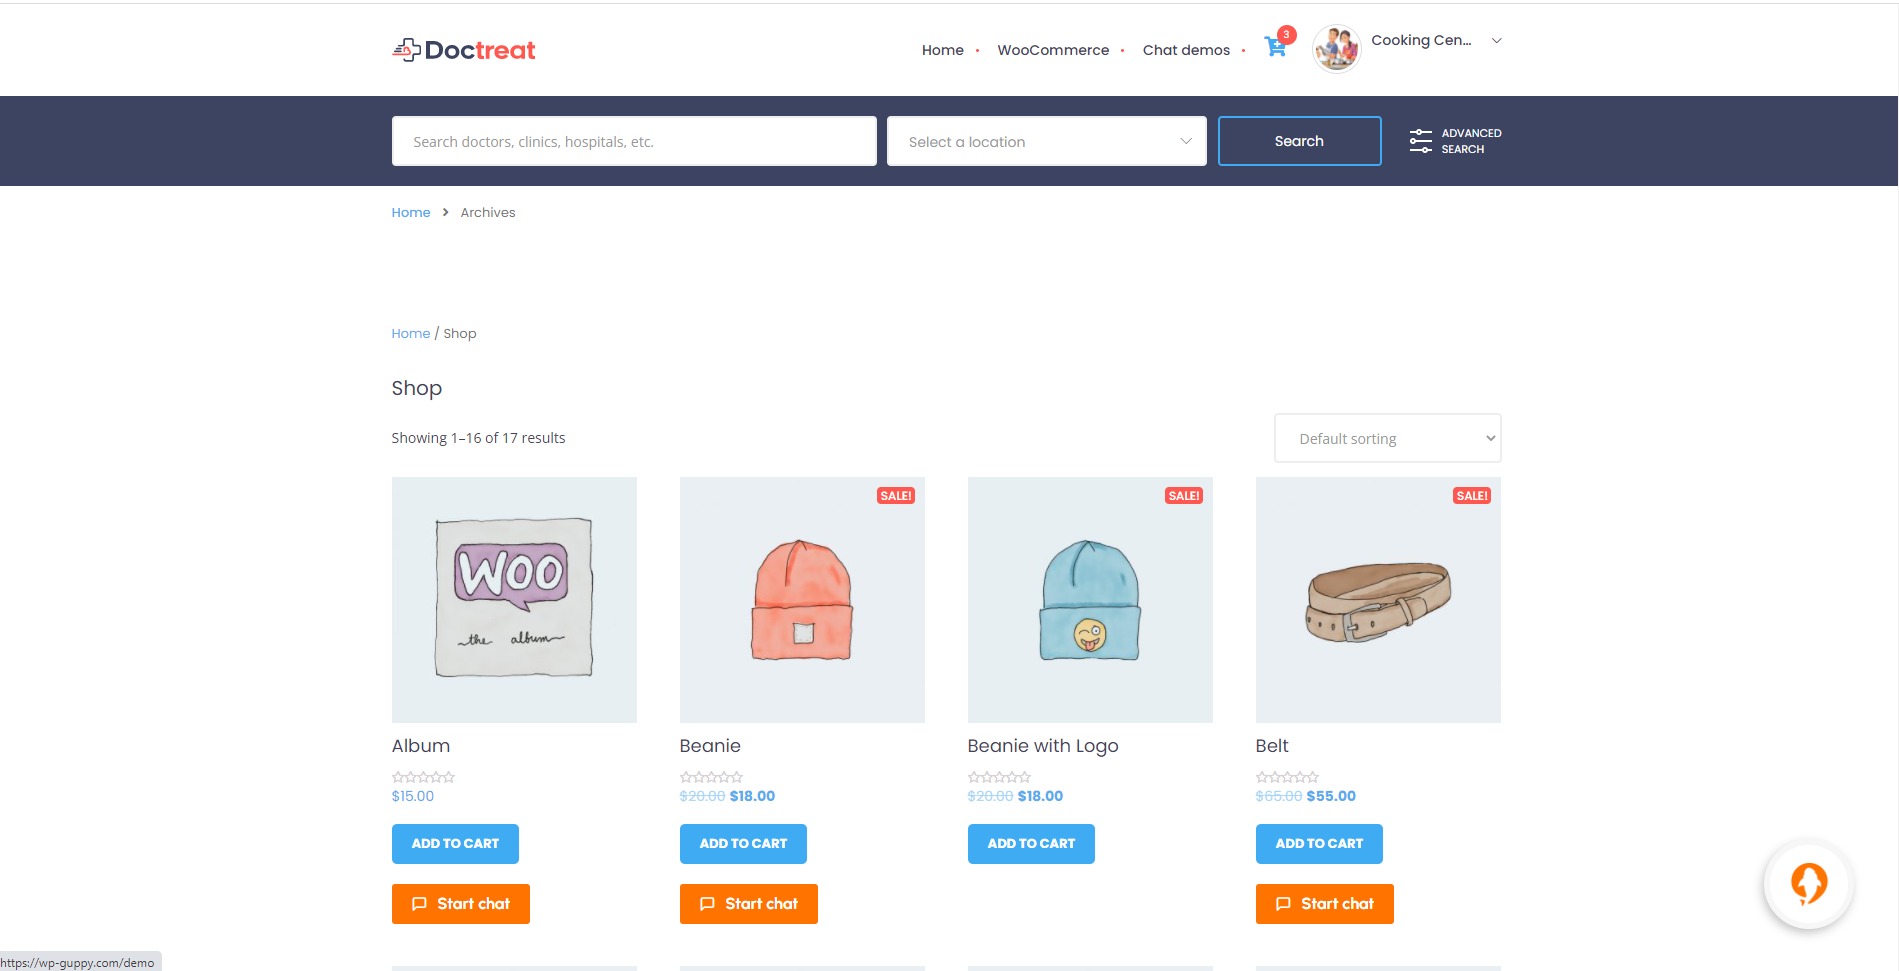
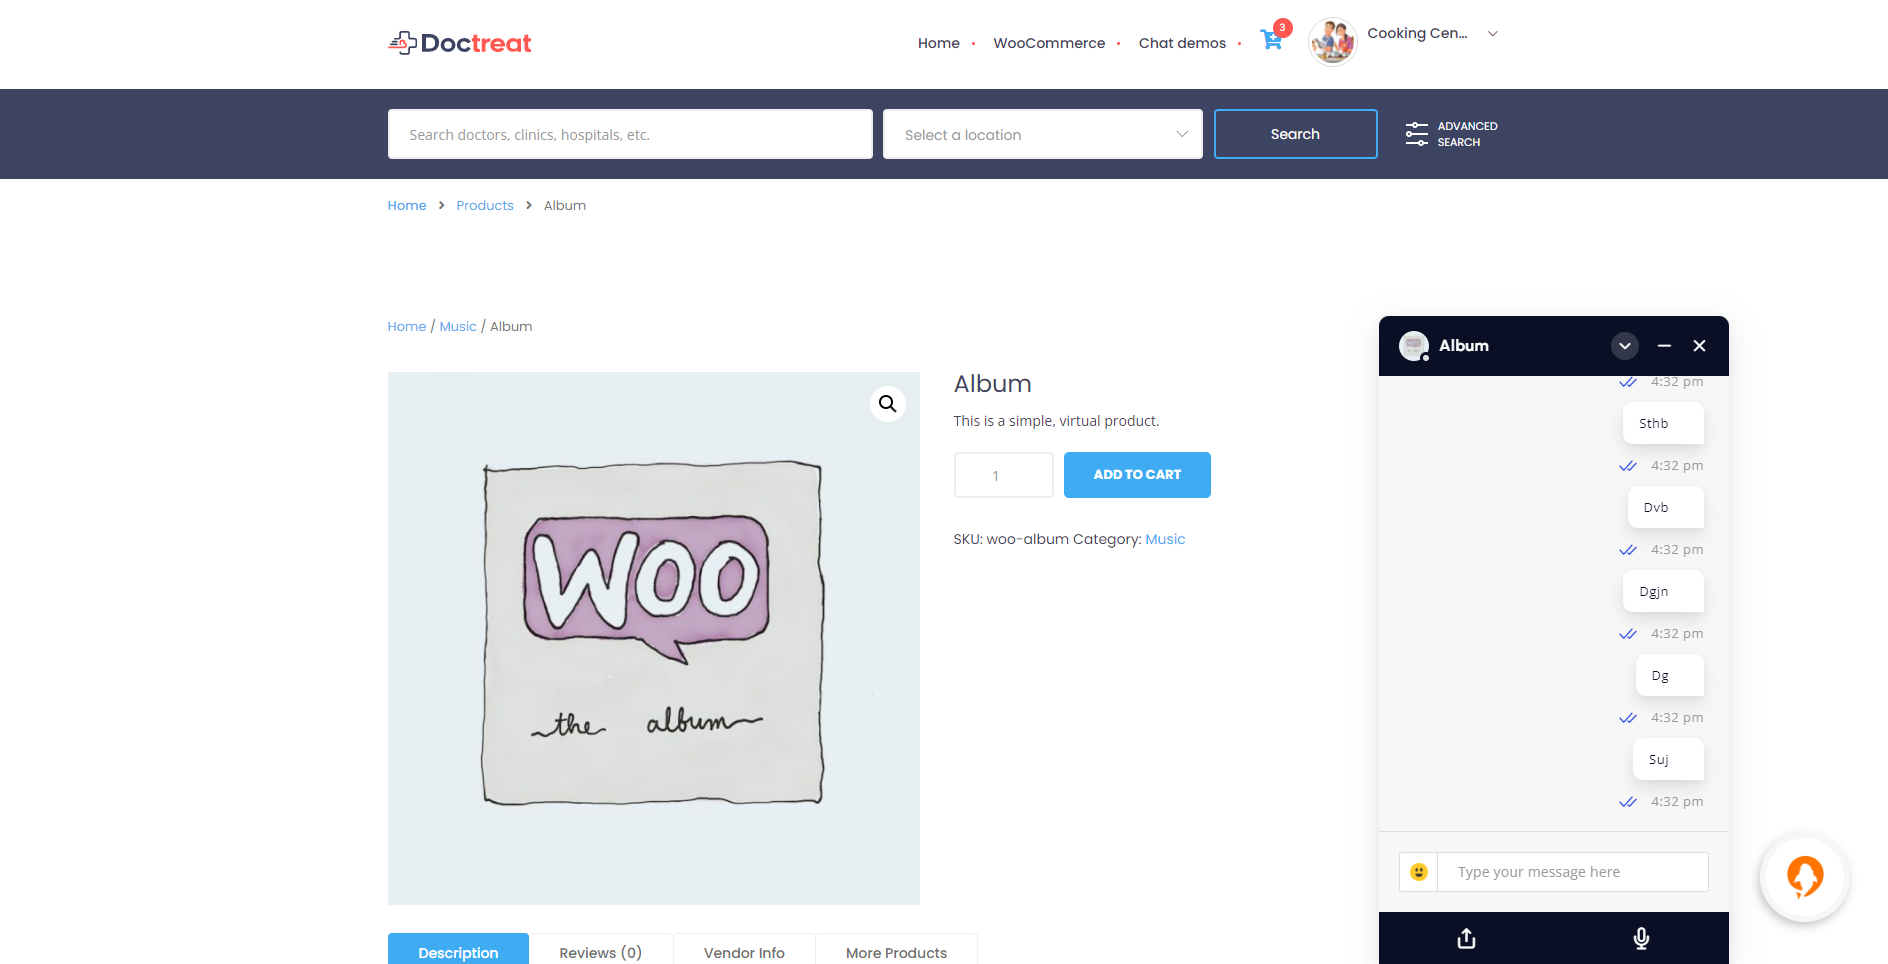
To enable the "WP Guppy Product base chat" on the product pages for specific role-based users, simply go to the WP Guppy tab > General from your WordPress admin and select products type from Allow post types for that user role,and hit the save changes button on the bottom.
It will show the Start chat button on the product listing page. And also, it will automatically open a chat window on the product detail page to start a quick chat. (See screenshots below)
Chat tabs
In chat tabs, admin can set default active tabs as well as which tab to show on the front-end. Like admin can hide Blocked users list
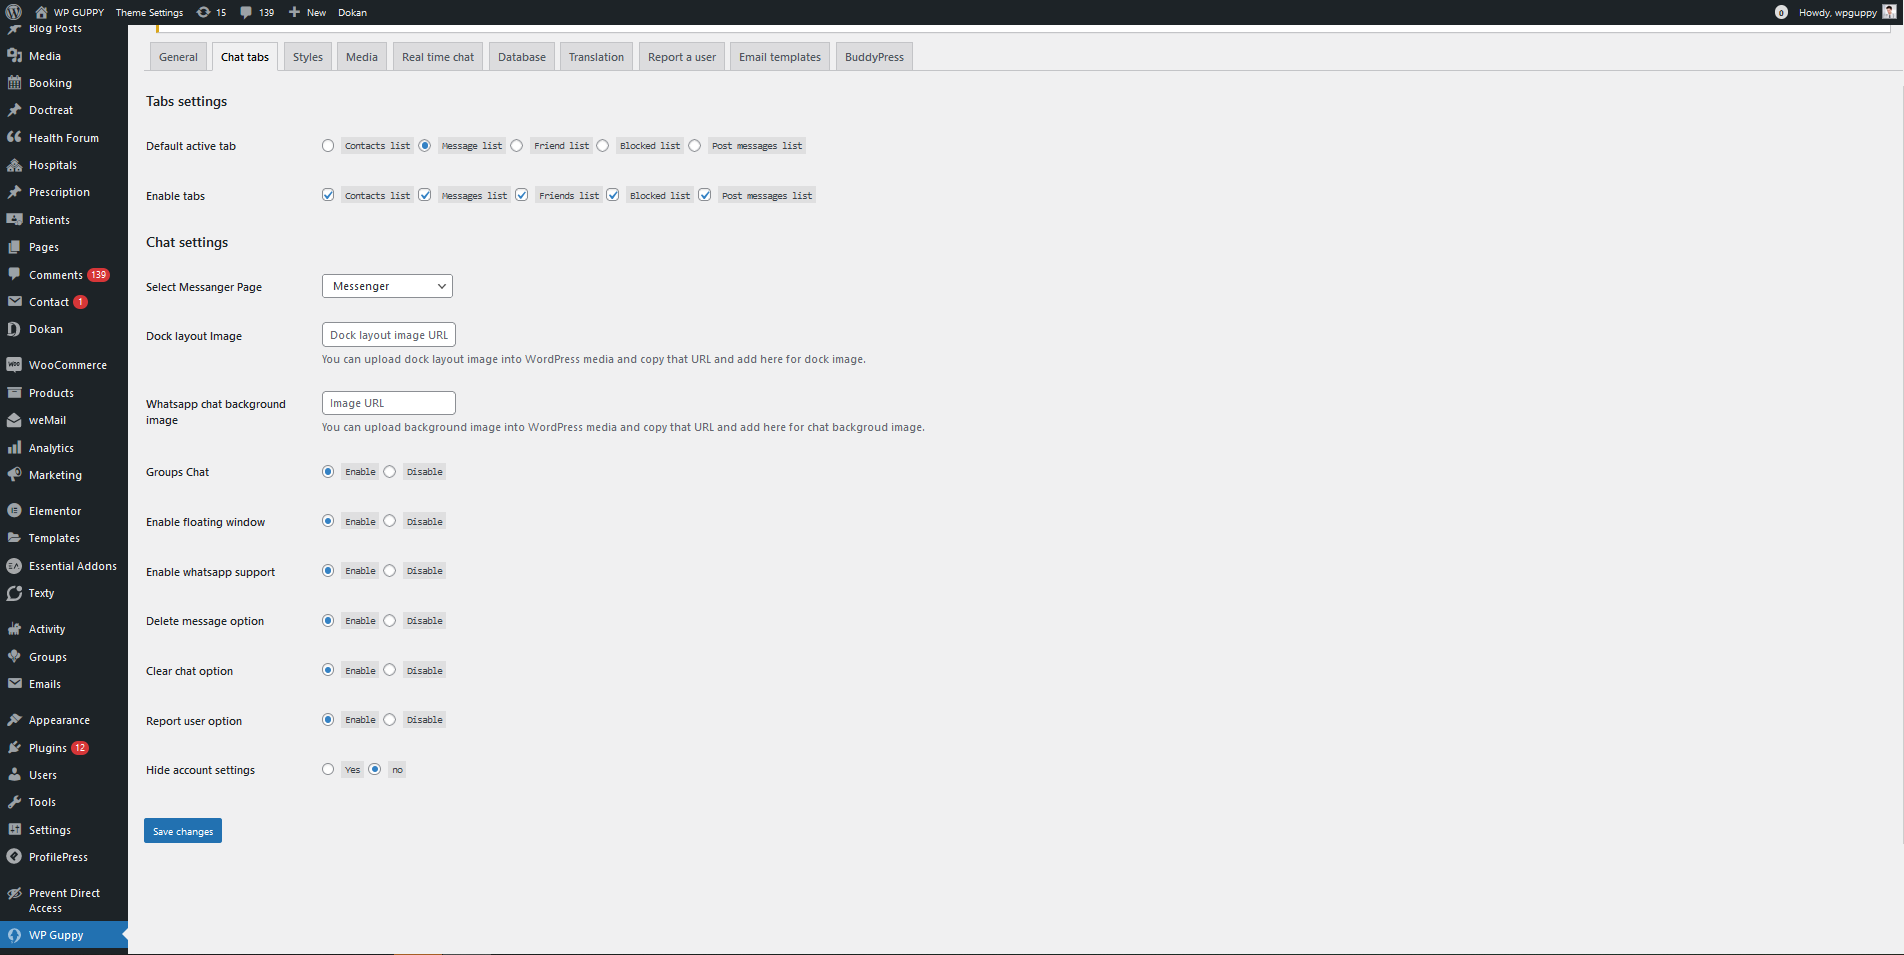
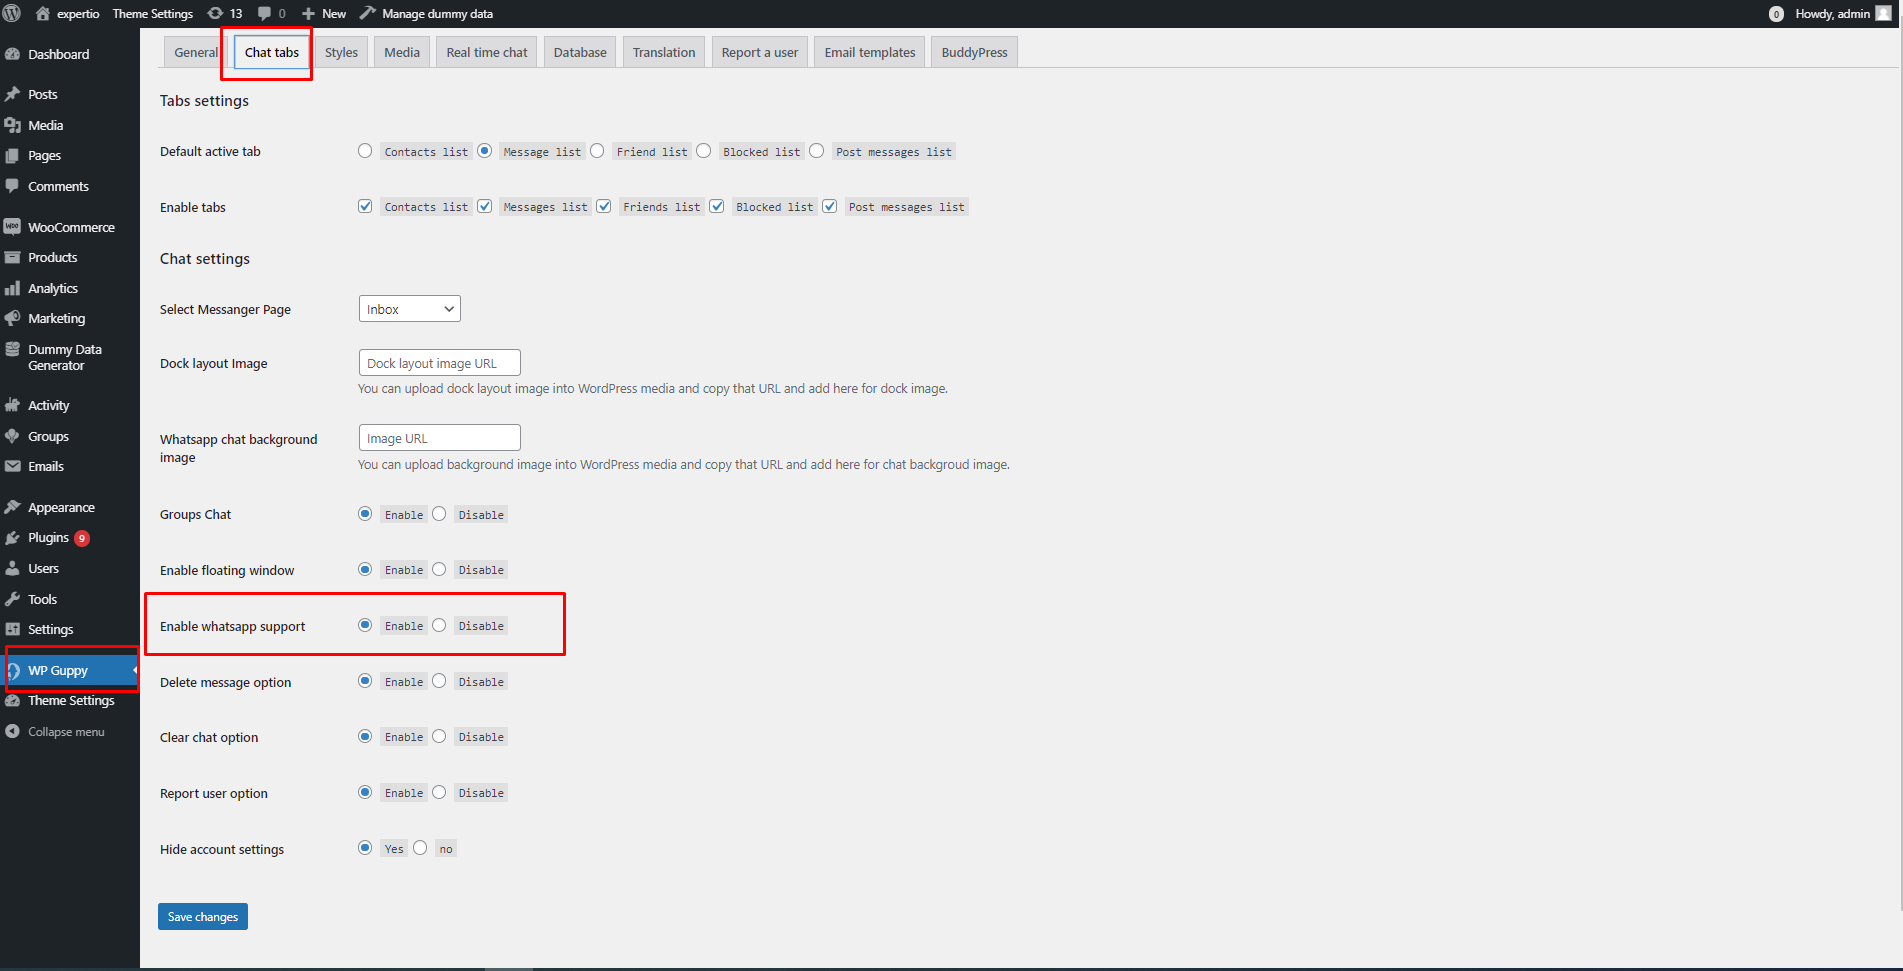
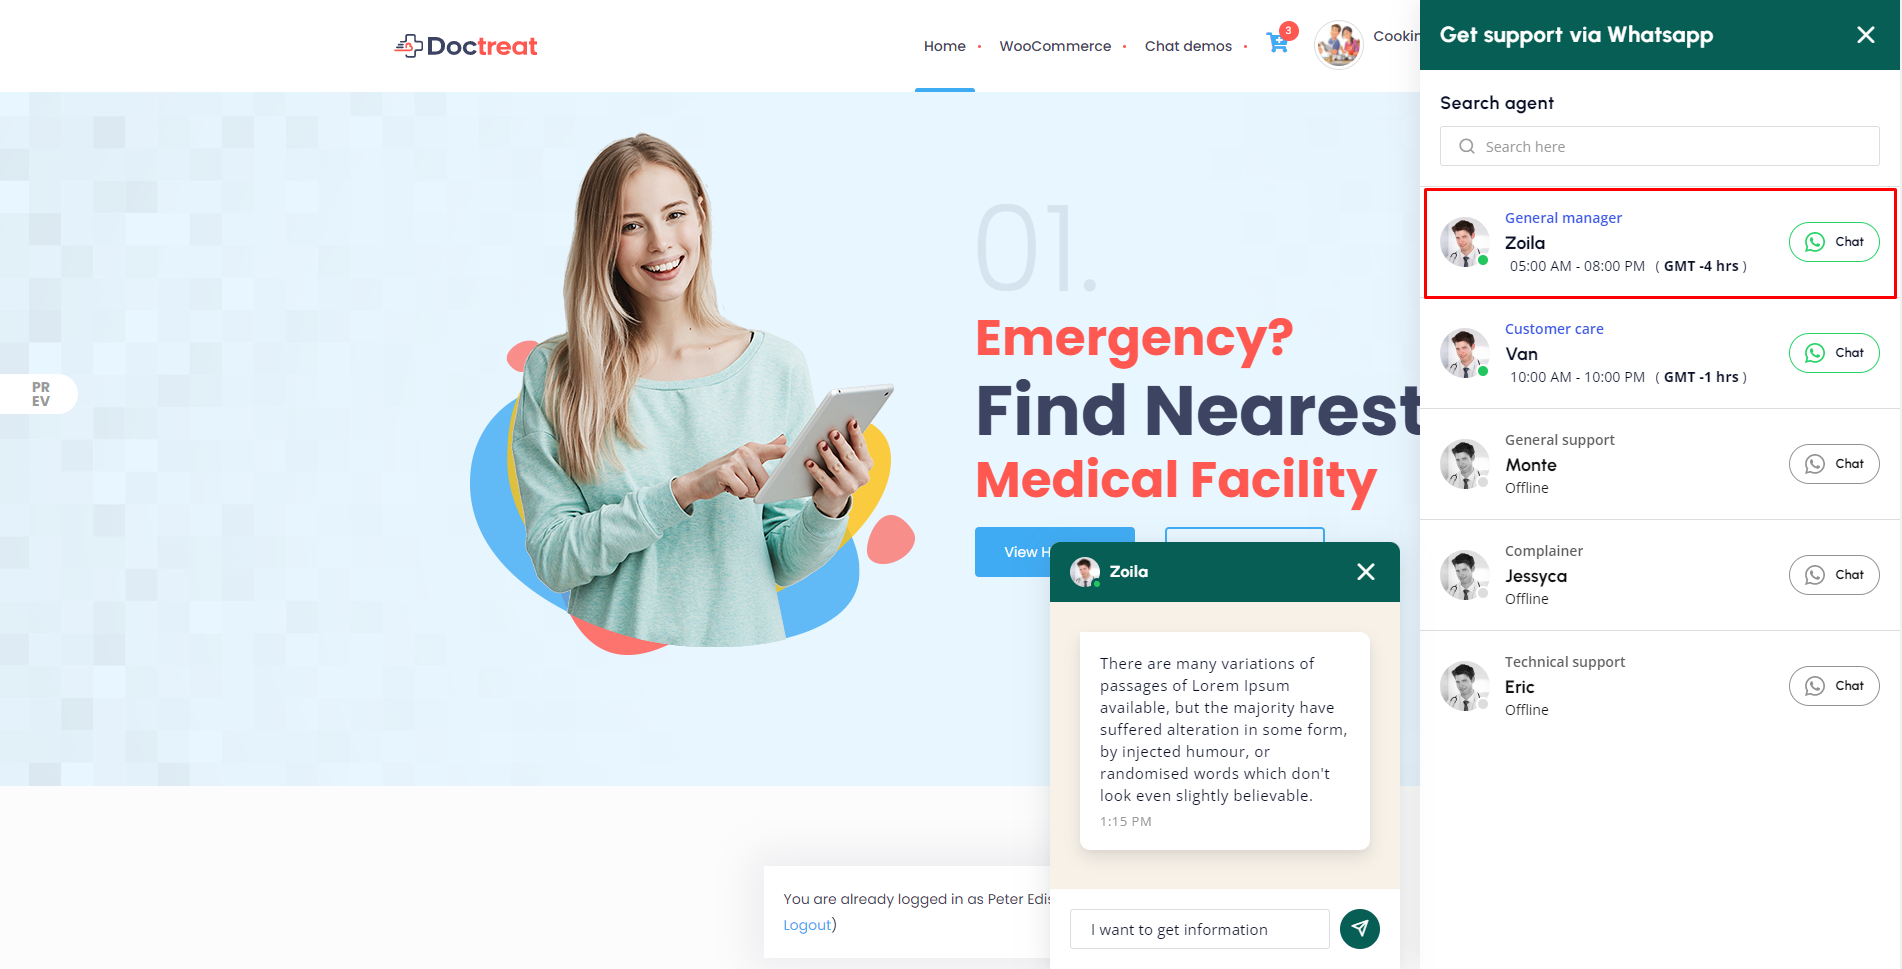
WhatsApp support feature
To enable the WhatsApp support feature, you need to perform a few steps.
-
Go to the WP Guppy tab > Chat tabs from your WordPress admin, then enable the WhatsApp support and hit the save changes button
(See screenshots below)
-
Go to the Users tab from your WordPress admin, click on that user's WhatsApp edit button who you want to make as a support member. Fill out all the details in the popup and hit the save & update button
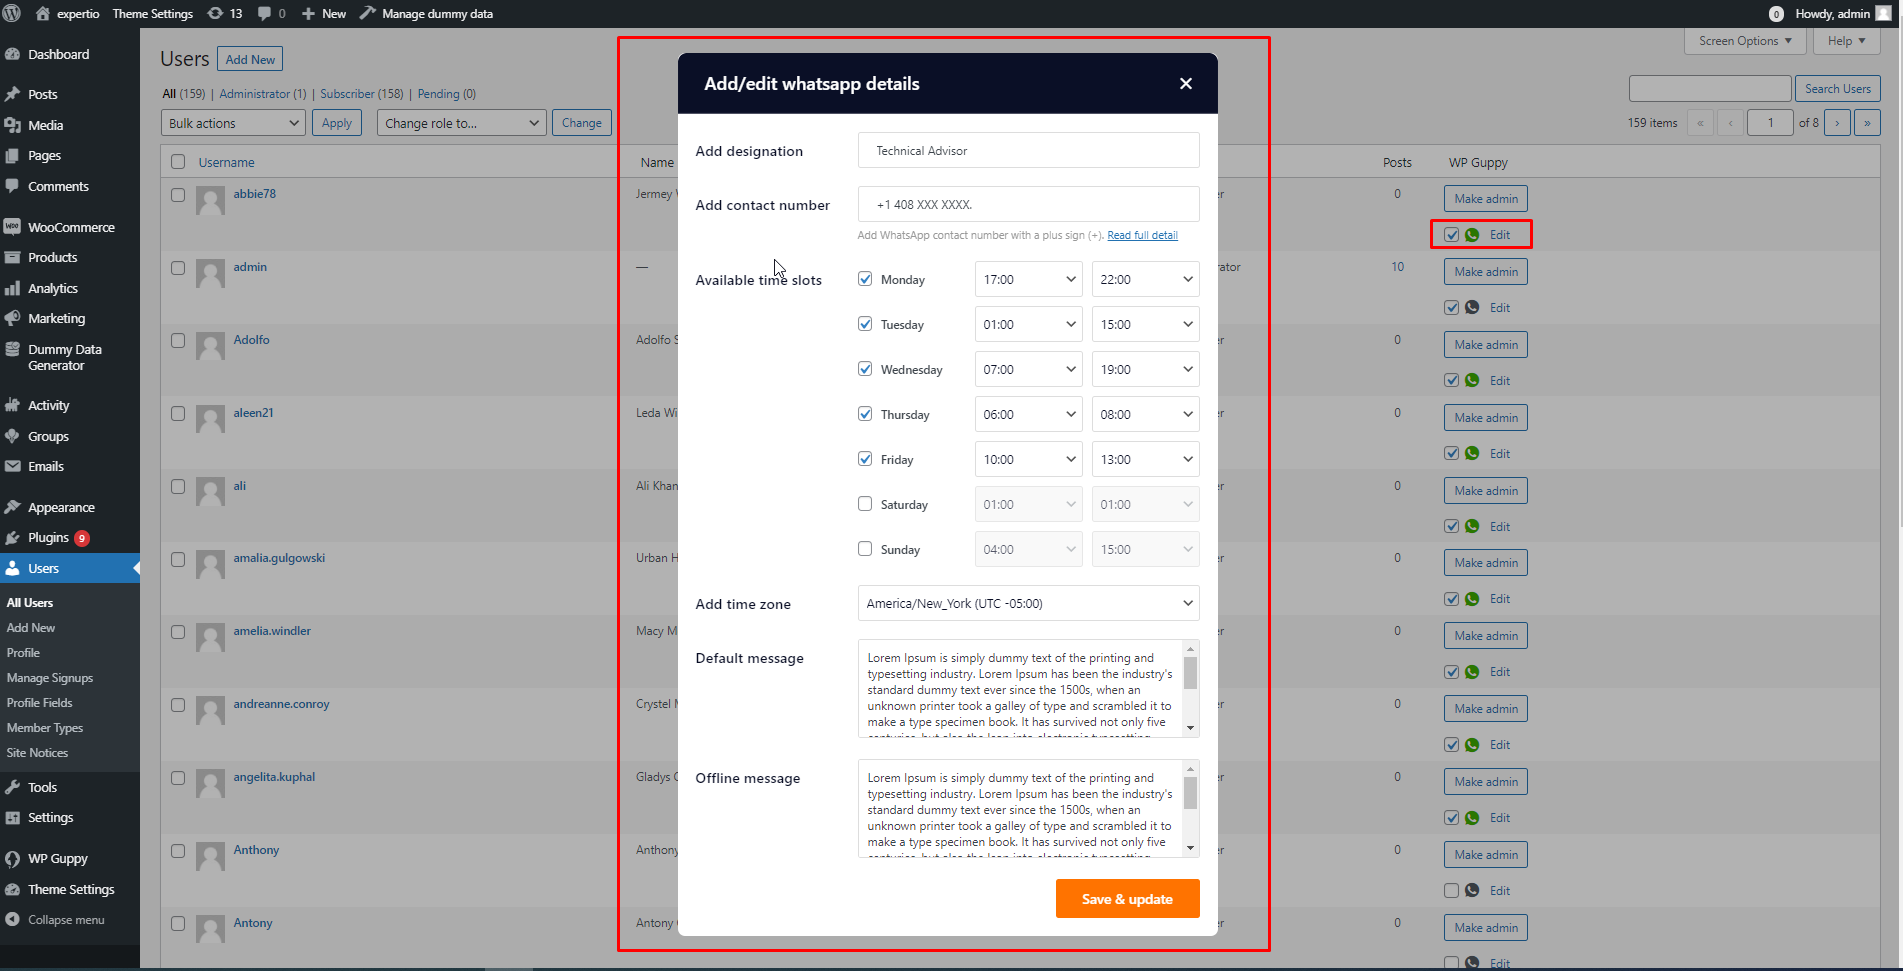
That's it. You've added your first WhatsApp support member successfully
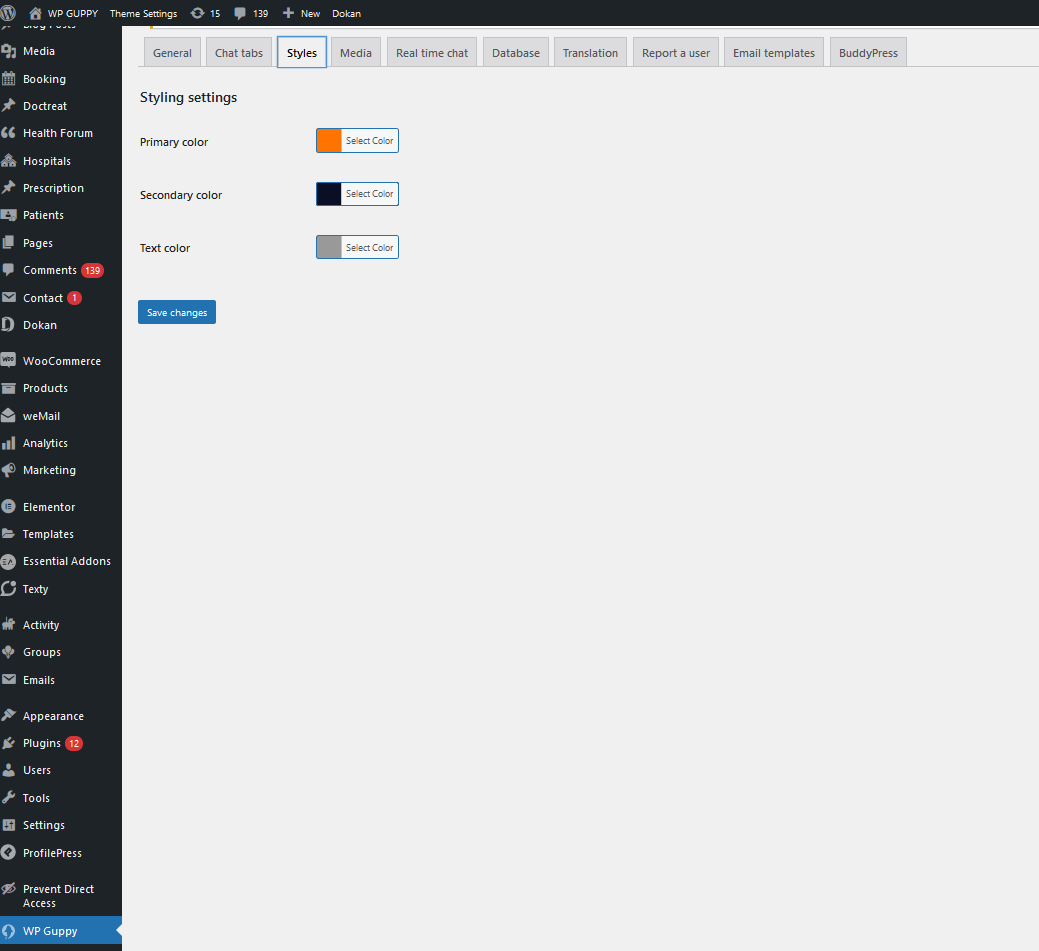
Styles
You can change primary, secondary and text color
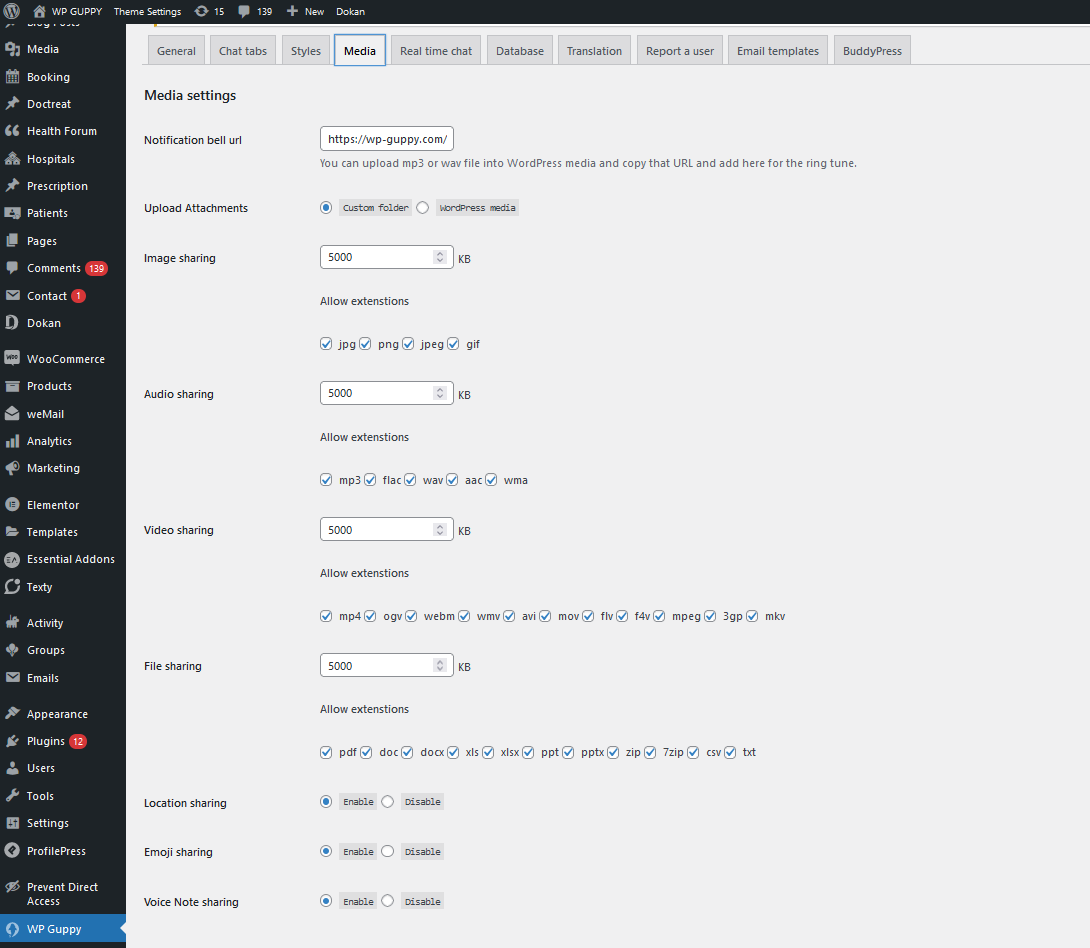
Media
- You can control media sharing and allowed file extensions. Like in image sharing admin can allow only JPG files only and also limit how much size could be for the uploading
- Admin can disable or enable location sharing, emoji sharing and voice note sharing
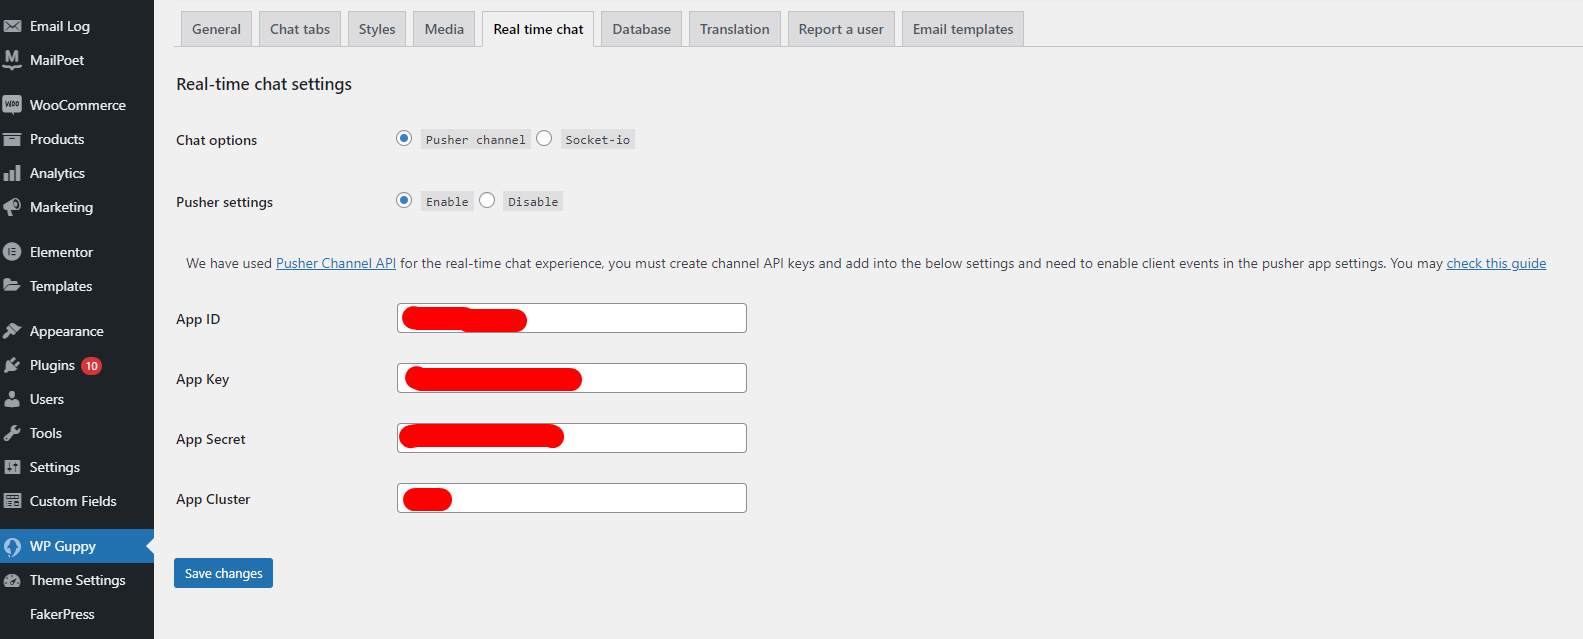
Real time chat
Pusher
This is required part of our plugin, otherwise your chat will not be real-time and you have to refresh the page to get new messagesAdmin can enable to disable the pusher, if enable then real-time notifications and chat will work. We have used Pusher.com Channels API This API is free for 100 concurrent connections. If your usage is more than 100 concurrent connections then you must buy their plan.
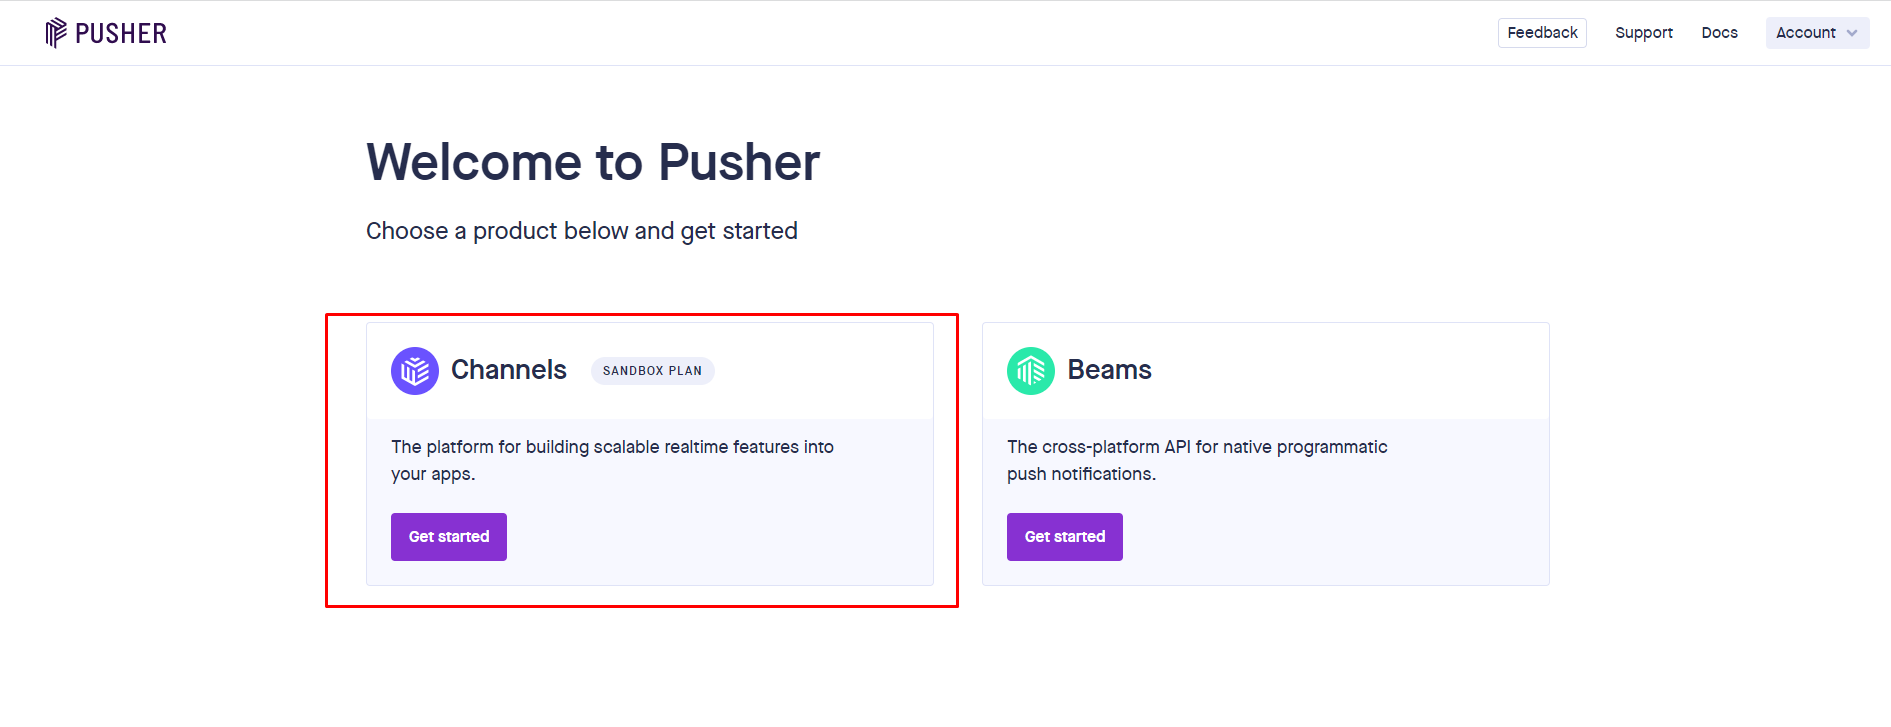
- After creating an account on the pusher.com, you will be redirected to dashboard. You need to create a Channel.
- Click on get started, system will ask to create an app
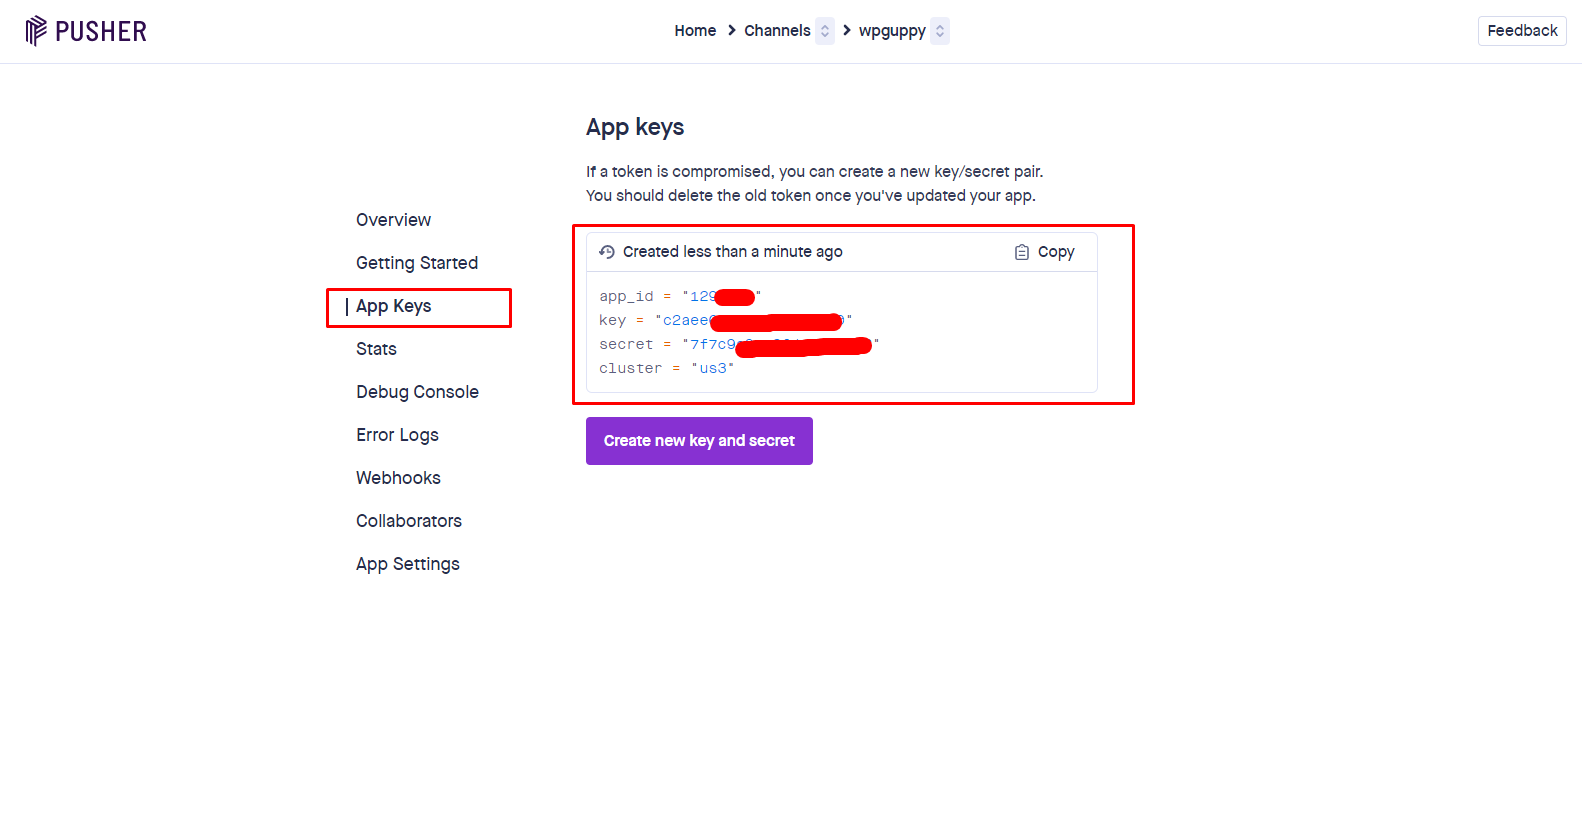
- After create an app, you will be redirect to a page where you can find APP Keys. Just copy and paste into plugin settings

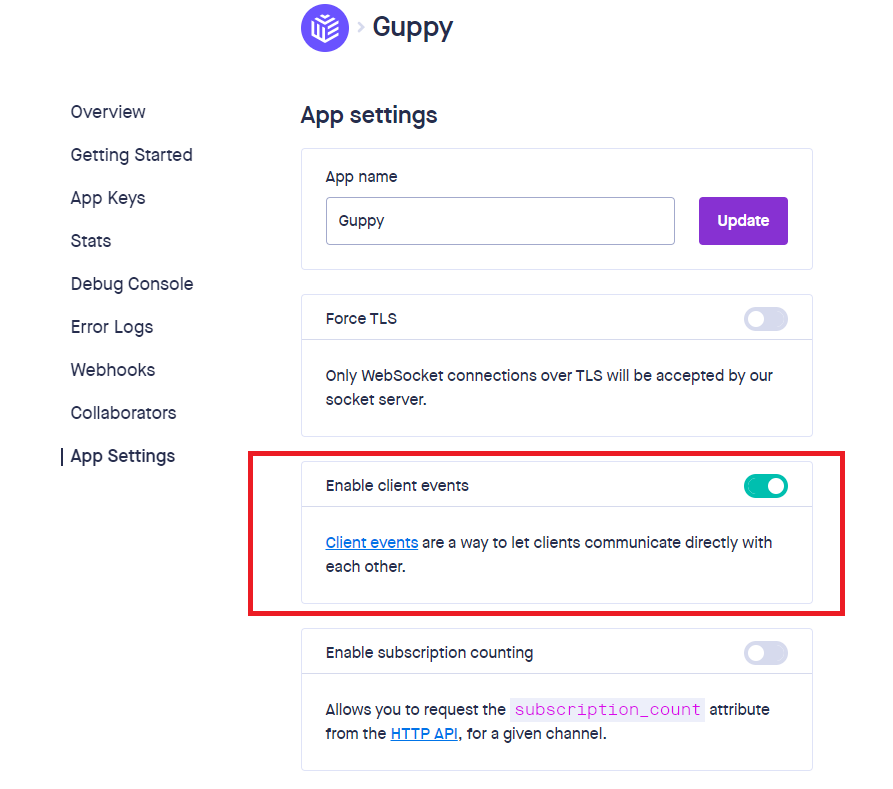
Clients events
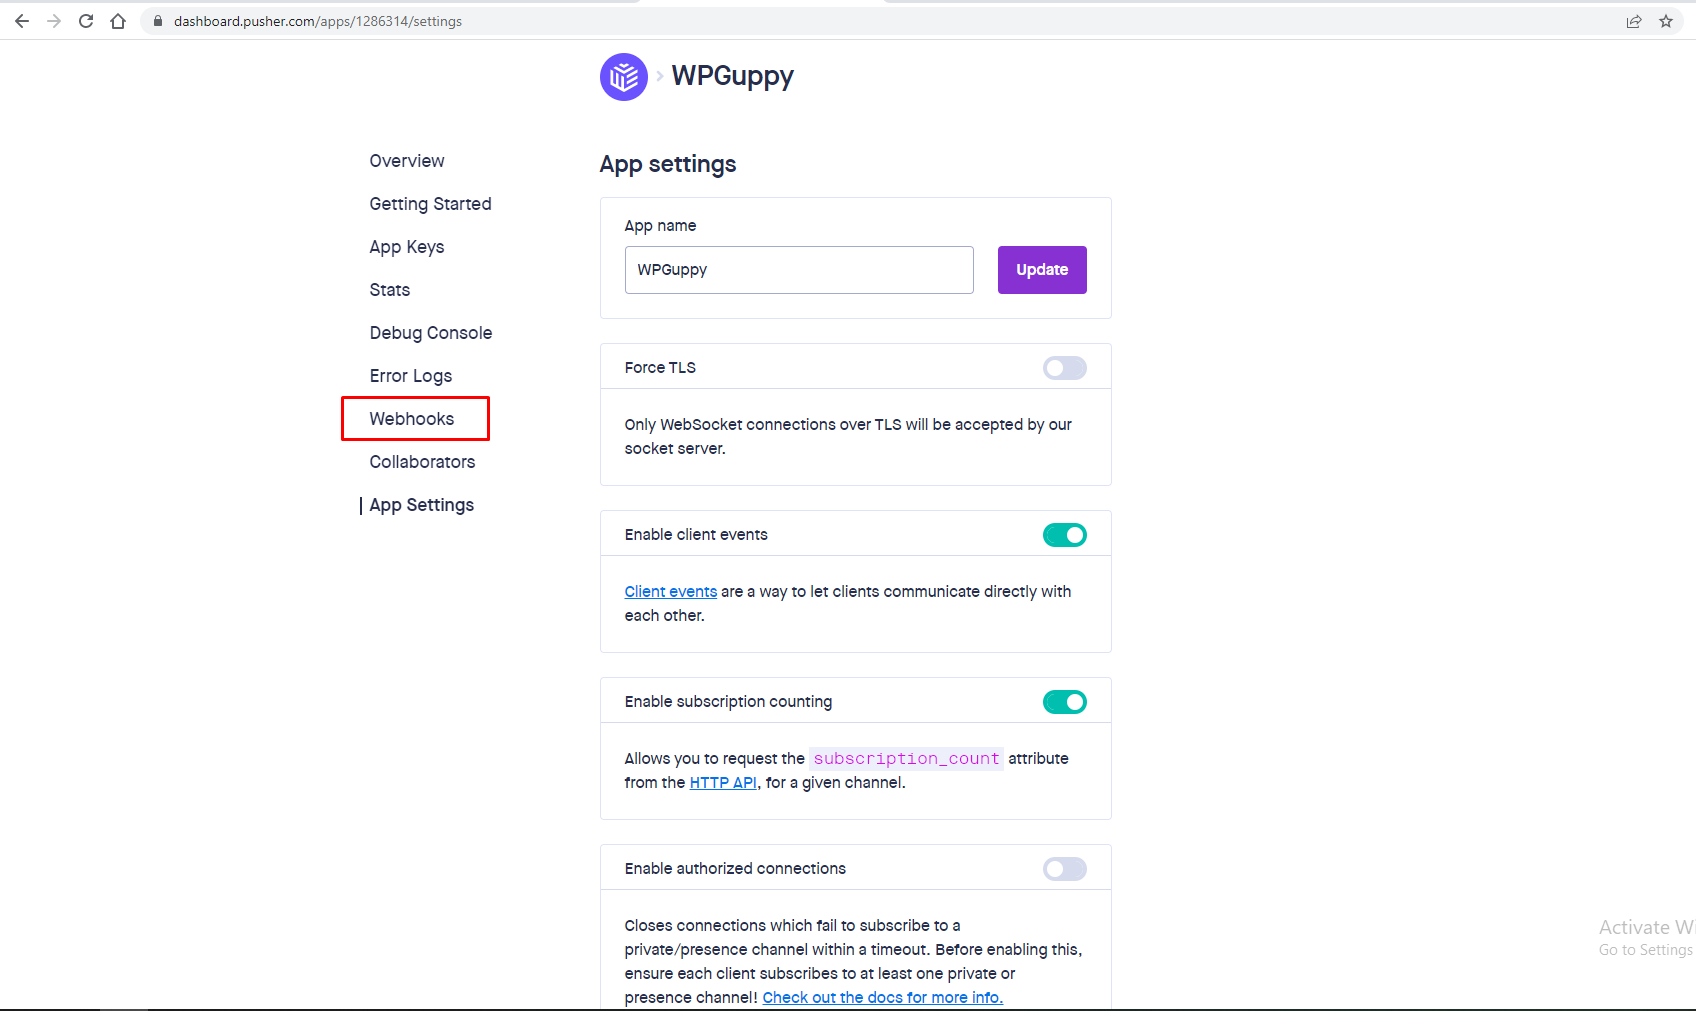
To enable client events like (type indicator) you must need to enable client events.You can enable it in your pusher channel app settings.
Real-time Online Presence
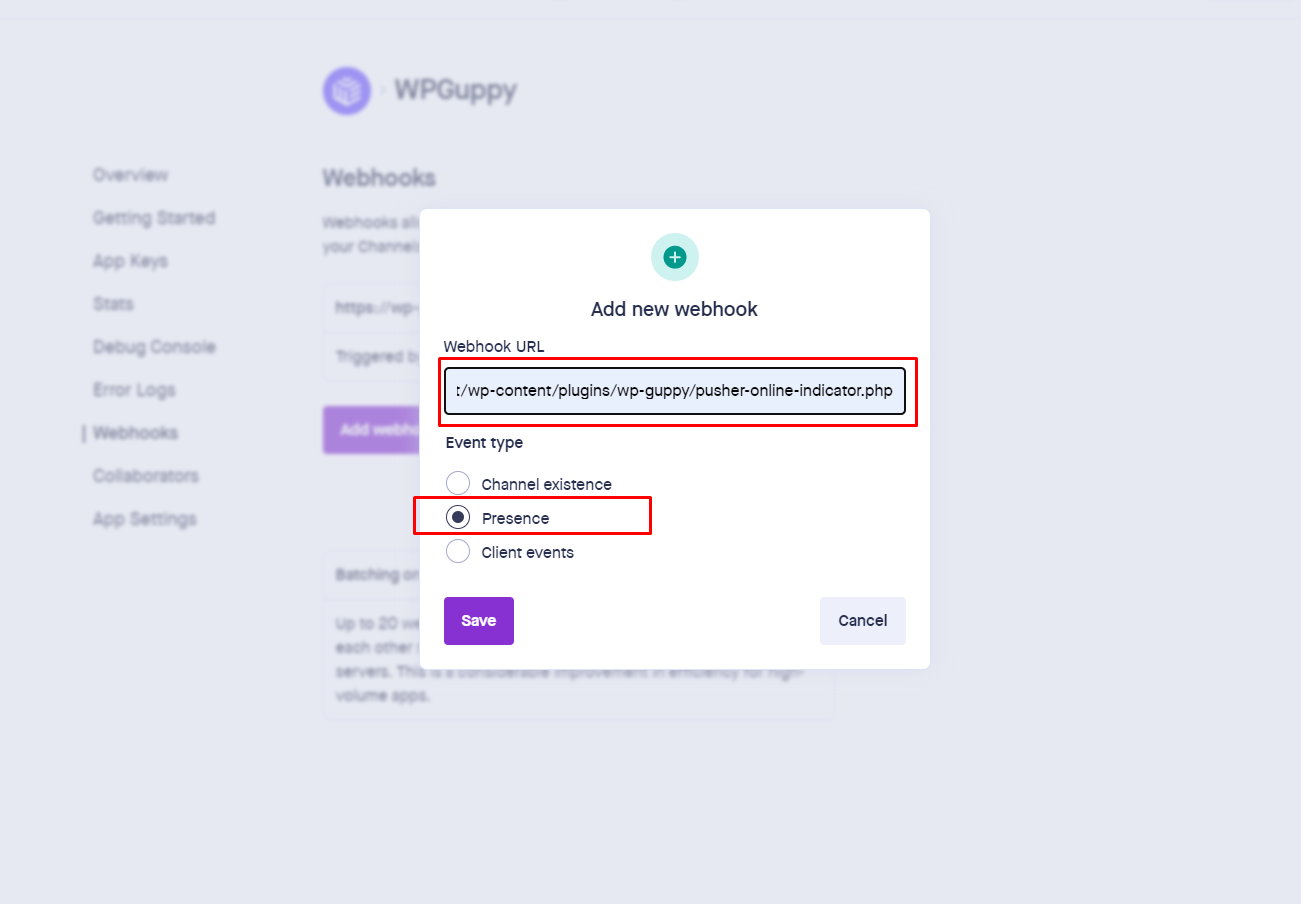
If you want to set up a pusher for a real-time chat, you need to add a webhook file path in your pusher account app settings.
Just log in to your pusher account, go to the webhook menu and add the endpoint e.g.
( https://addyourdomain.com/wp-content/plugins/wp-guppy/pusher-online-indicator.php )
Don't forget to select the event type as "Presence" and hit the save button.
Note, please make sure your URL path should be the same from here onward (wp-content/plugins/wp-guppy/pusher-online-indicator.php)
Note ( If you're using the Node server for real-time chat, you don't need to do anything. )
Node server View full video description here
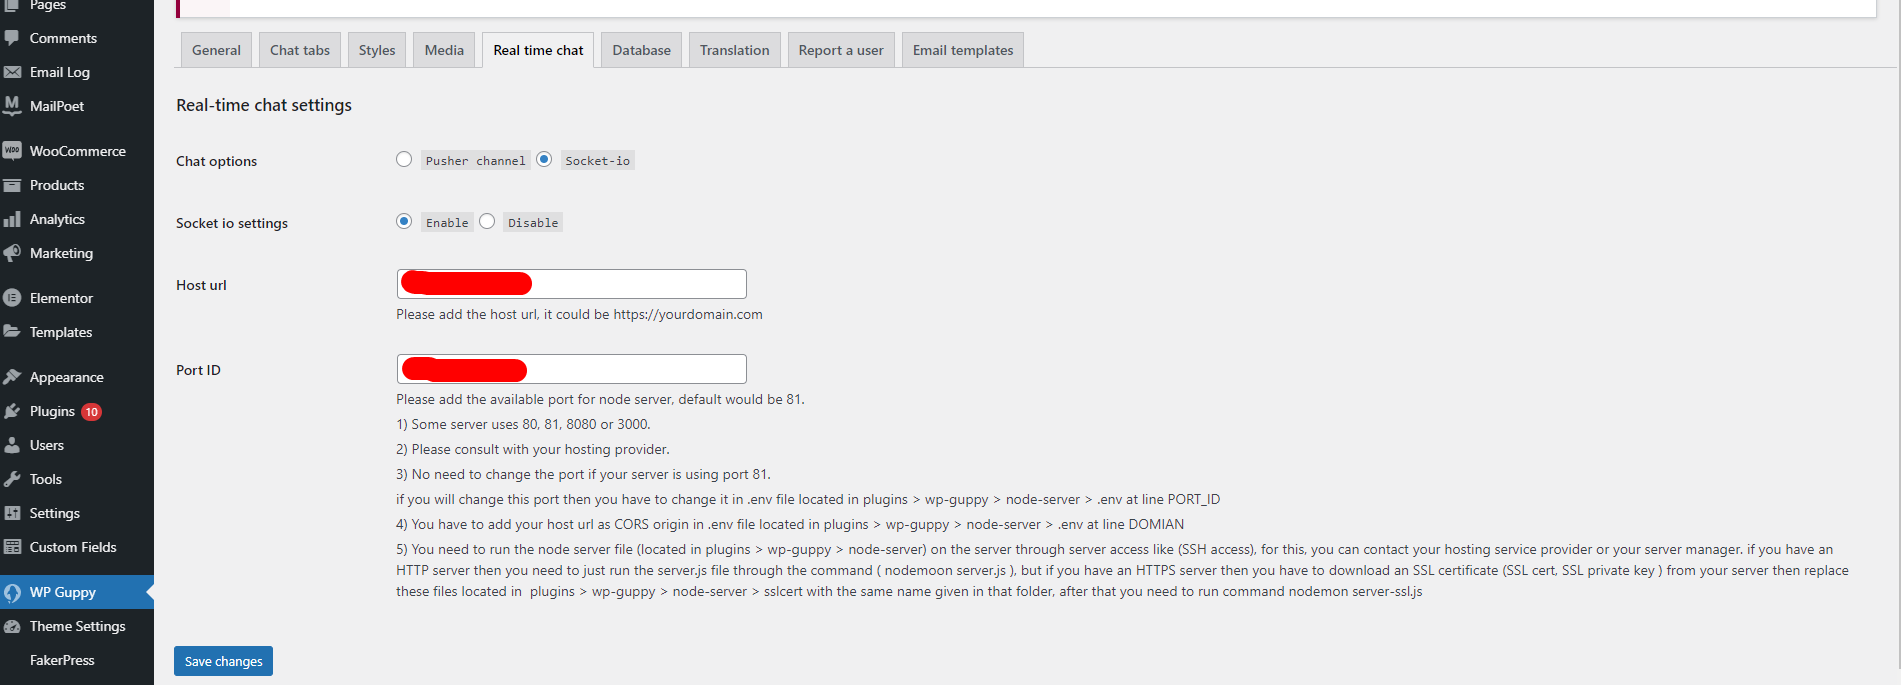
Socket.io and Node server can be used for real-time chat experience
- You have to install the first node server on your hosting server then you need to update npm packages in location plugins > wp-guppy > node-server
- Add host URL, it could be https://yourdomain.com
-
Add port ID for node server, default would be 81.
- Some server uses 80, 81, 8080, or 3000.
- Please consult with your hosting provider.
- You need to install pm2 globally on your hosting server through this command npm install pm2 -g for this, you can contact your hosting service provider or your server manager.
- You have to add your port id in .env file located in plugins > wp-guppy > node-server > .env at line PORT_ID.
- You have to add your host url as CORS origin in .env file located in plugins > wp-guppy > node-server > .env at line DOMIAN.
- No need to change the port if your server is using port 81. (if you will change this port then you have to change it in the .env file located in plugins > wp-guppy > node-server > .env at line PORT_ID).
- You need to run the node server file (located in plugins > wp-guppy > node-server) on the server through server access like (SSH access), for this, you can contact your hosting service provider or your server manager. if you have an HTTP server then you need to just run the server.js file through the command ( pm2 start server.js ), but if you have an HTTPS server then you have to download an SSL certificate (SSL cert, SSL private key ) from your server then replace these files located in plugins > wp-guppy > node-server > sslcert with the same name given in that folder, after that you need to run command (pm2 start server-ssl.js) at (plugins > wp-guppy > node-server) path.
- If the plugin update is available for node server packages than you need to run command(npm update) at (plugins > wp-guppy > node-server) path.
- If the plugin update is available for node server then you need to run command(pm2 restart server.js) for HTTP servers and command(pm2 restart server-ssl.js) for HTTPS servers at (plugins > wp-guppy > node-server) path.
Database
Admin can reset database in one click, please note upon reset database your all the chat data will be lost. So please be careful and keep the backup before run this action

Translations
Admin can change each text string from the plugin settings
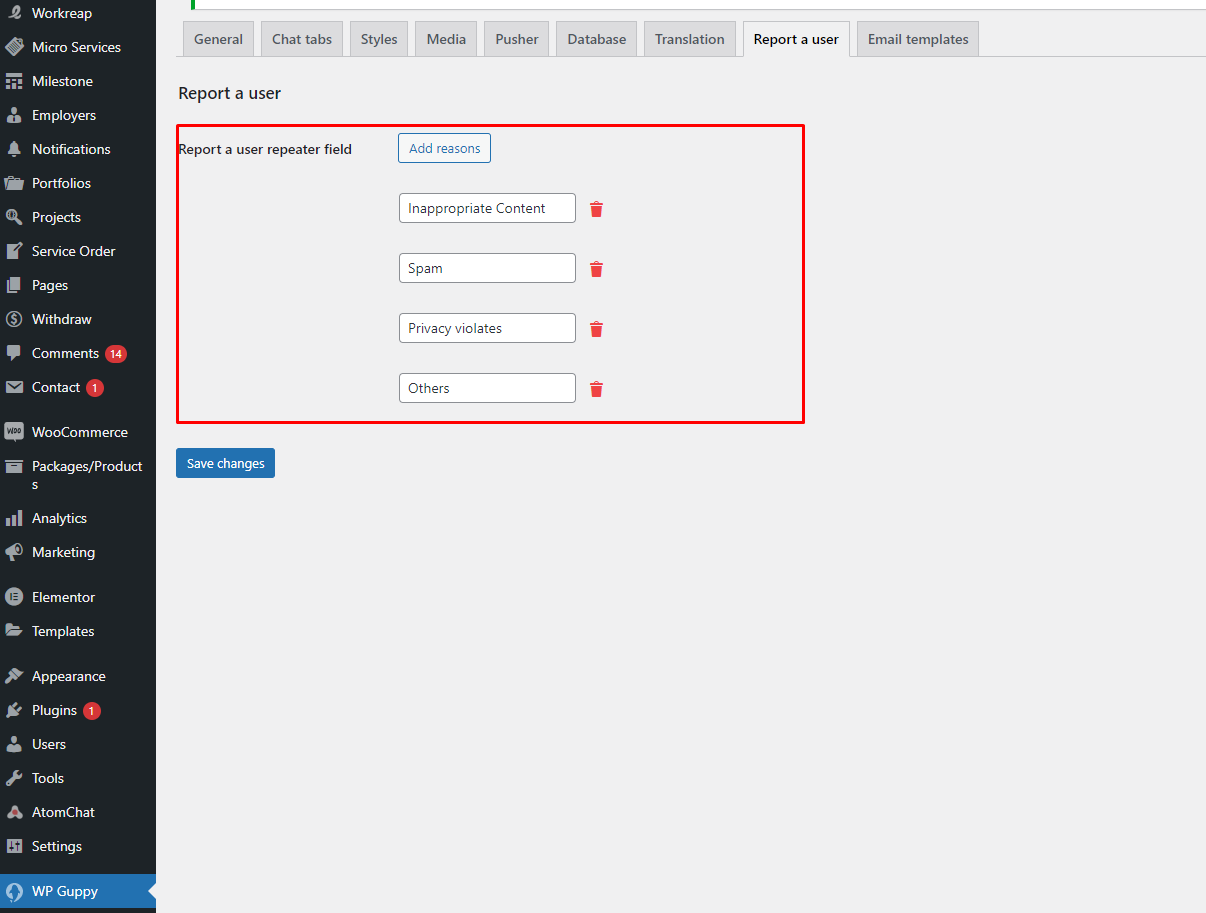
Report a user
Any logged in user can report an other user via email. Admin can setup report a user reasons from the back-end
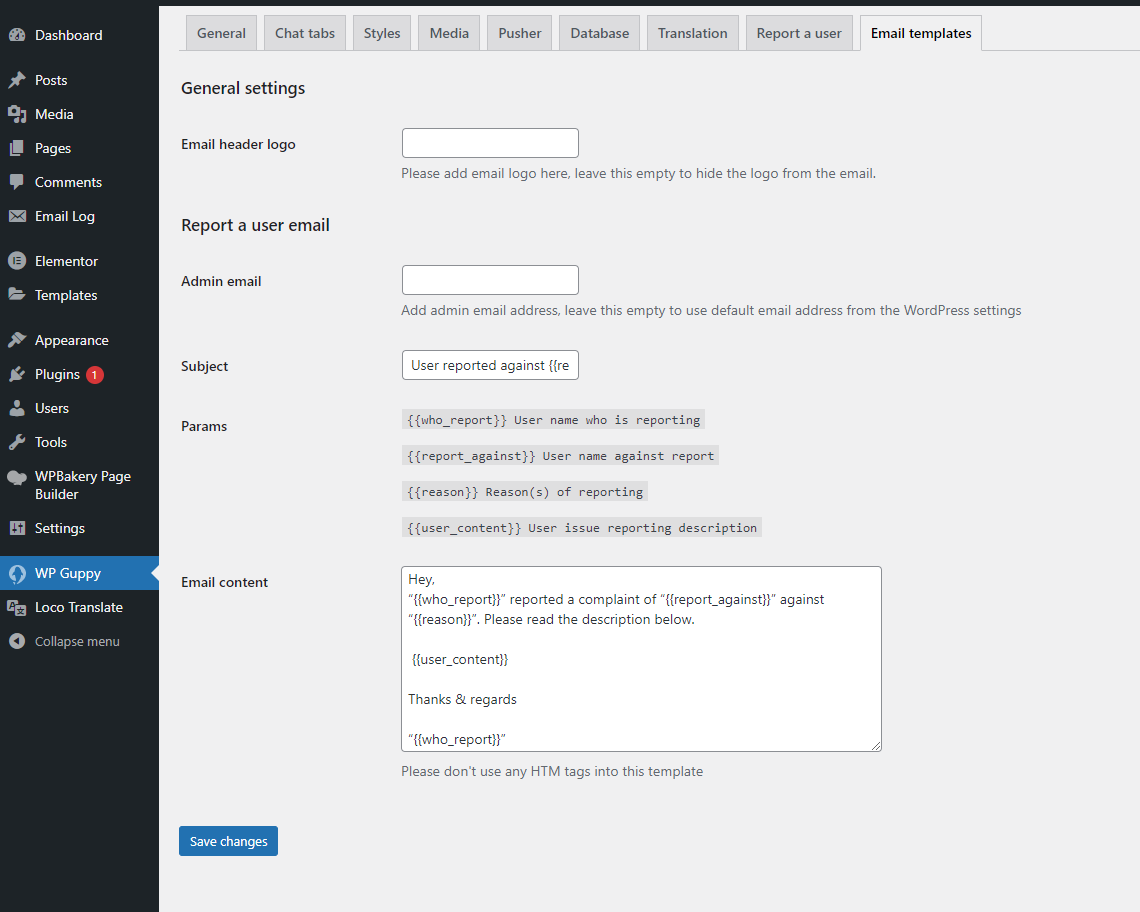
Emails
Admin can control all the email templates from the back-end. For example we added report a user email template.
JWT Authentication
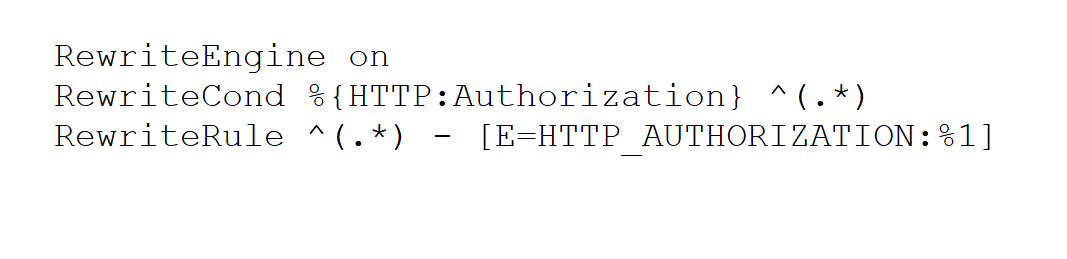
While using the WPGuppy plugin you need to make sure that your hosting service enabled the Authorization header because we are using JWT for authentication that needs authorization header, if your hosting server disabled the Authorization header then you need to enable it in the .htaccess file for example.
      RewriteEngine on
      RewriteCond %{HTTP:Authorization} ^(.*)
      RewriteRule ^(.*) - [E=HTTP_AUTHORIZATION:%1]
      SetEnvIf Authorization "(.*)" HTTP_AUTHORIZATION=$1
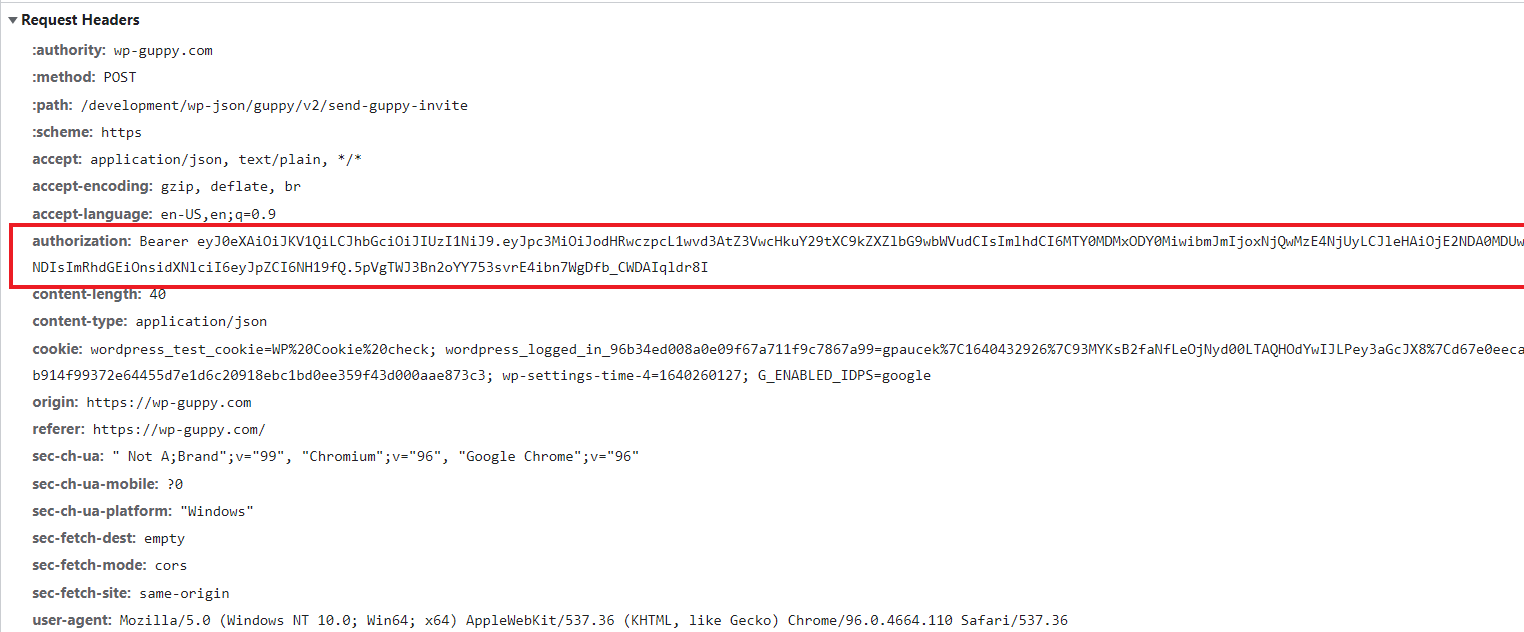
You can check the Authorization header in the network tab
Libraries and API used in WP Guppy Pro
- https://www.npmjs.com/package/vue
- https://www.npmjs.com/package/axios
- https://www.npmjs.com/package/dateformat
- https://www.npmjs.com/package/core-js
- ttps://www.npmjs.com/package/emoji-mart-vue-fast
- https://www.npmjs.com/package/jquery
- https://www.npmjs.com/package/leaflet
- https://www.npmjs.com/package/vue2-leaflet-fullscreen
- ttps://www.npmjs.com/package/moment
- https://www.npmjs.com/package/pusher-js
- https://www.npmjs.com/package/vue
- https://www.npmjs.com/package/vue-audio-better
- ttps://www.npmjs.com/package/vue-axios
- https://www.npmjs.com/package/vue-linkify
- https://www.npmjs.com/package/vue-video-player
- https://www.npmjs.com/package/vue2-leaflet
- https://vuex.vuejs.org/installation.html
- https://pusher.com/
- https://www.npmjs.com/package/socket.io-client
- https://github.com/firebase/php-jwt
Since version 1.0 - top
Released on 06 November, 2021
- Released WP Guppy Pro – WordPress live chat plugin.